Maximizing CNC cutting efficiency using DXF files starts long before the machine turns on. When your drawings are clean, organized, and designed with the cutter in mind, you get shorter cycle times, less scrap, and repeatable jobs that are easy to run again and again.
DXF Files as the Foundation of an Efficient Workflow
DXF files are more than just “something the CAM software can open.” They are the digital blueprint that defines:
- How many moves your machine will make.
- How often it pierces, retracts, and rapids.
- How easily you can nest, quote, and rerun jobs later.
When you design and clean DXF files with efficiency in mind, every downstream step—from nesting to cutting—gets faster.
1. Design Parts to Be CNC-Friendly from the Start
Efficient cutting begins at the design stage. Ask yourself, “How will the machine move through this geometry?”
- Favor continuous contours: Long, smooth paths are faster than many tiny segments and islands.
- Avoid unnecessary complexity: Decorative spikes, jagged micro-details, and dense hatching slow motion and add no real value.
- Size features realistically: Keep holes, tabs, and slots large enough for your kerf and tools so they cut cleanly at normal speeds.
A design that “looks amazing” but forces the machine into stop-start motion is not efficient. Simpler, cleaner geometry usually wins in real production.
2. Clean DXF Geometry Before It Reaches CAM
Messy DXF files cause programming friction and longer run times. A few minutes of cleanup in CAD can save hours on the table.
- Remove duplicate lines and overlapping arcs that cause double cuts.
- Close all open contours so CAM recognizes full profiles instantly.
- Delete dimensions, hatches, and stray points that do not contribute to cutting.
- Convert splines into polylines or arcs that your CNC software can process smoothly.
Clean geometry means faster toolpath calculation and smoother motion, which directly improves cutting efficiency.
3. Optimize Curves for Smooth, High-Speed Motion
CNC controllers love smooth curves and hate thousands of tiny segments. The way curves are stored in your DXF affects how fast you can run.
- Use “simplify” tools to reduce node count on curves without changing the overall shape.
- Replace irregular traced outlines with true arcs and circles wherever possible.
- Pay extra attention to logos and decorative patterns—these are where needless nodes usually pile up.
The smoother the math behind each curve, the more confidently you can increase feed rates without chatter or visible faceting.
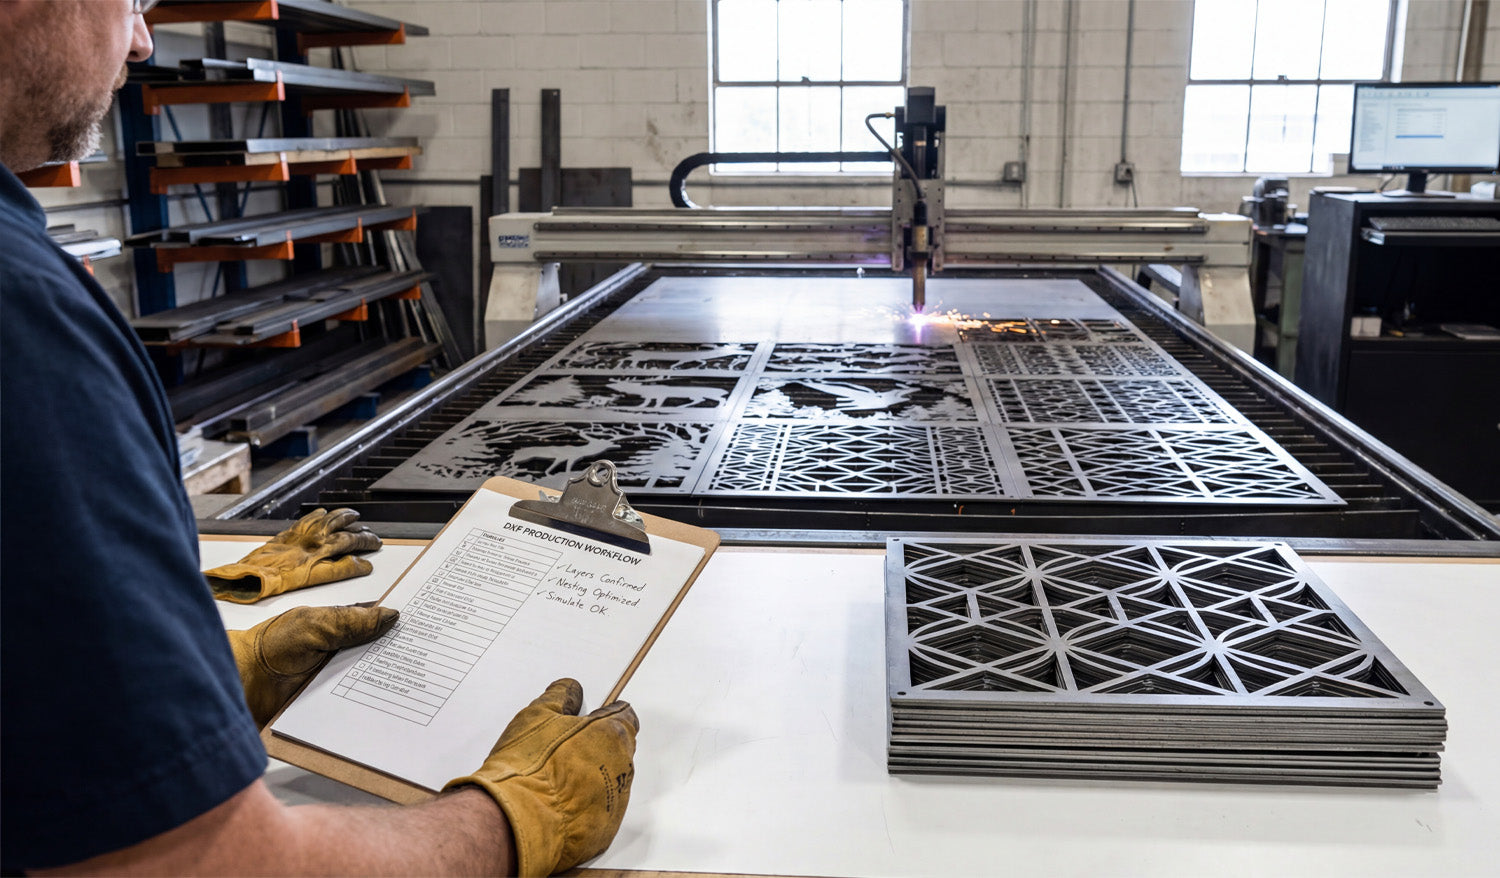
4. Use Layers to Automate Fast CAM Setup
Efficient shops do not rebuild CAM strategies from scratch every time. They use DXF layers to drive automated toolpath rules.
- Standardize layers like OUTER_CUT, INNER_CUT, ENGRAVE, and MARK.
- Assign entities to the right layer as part of your normal drawing process.
- Create CAM templates that map each DXF layer to a tool, speed, and cut rule.
With this system, importing a well-layered DXF becomes a two-minute job: choose the template, confirm the toolpaths, and you’re ready to nest and post.
5. Design Parts for Efficient Nesting
Good DXF design makes nesting faster and more material-efficient at the same time.
- Keep parts rectangular or gently contoured where possible—these nest easier than random shapes.
- Consider common-line cutting for compatible parts to reduce total cut length.
- Avoid unnecessary protrusions that force awkward gaps between parts.
When your DXF parts are nesting-friendly, you spend less time manually arranging layouts and more time cutting full sheets.
6. Reduce Pierces and Retracts in Your DXF Strategy
Each pierce and retract adds time, especially for plasma and laser cutting. Smart DXF design can cut those counts down.
- Combine small features into shared shapes instead of many isolated cutouts.
- Use slots instead of clusters of holes when functionally acceptable.
- Group similar features so CAM can cut them in one continuous sequence instead of jumping around the sheet.
Fewer pierces and retracts mean less wear on consumables and shorter overall cycle times.
7. Match Detail Level to Machine and Material
Pushing ultra-fine detail through a machine that cannot support it is a direct hit to efficiency.
- For plasma, avoid micro details that will burn out or warp; use bold, simplified geometry.
- For routers, keep gaps wider than your smallest tool diameter so you can run at normal speeds.
- For lasers, you can keep more detail, but still avoid fragile bridges that slow motion or break during handling.
Designing to the realistic limits of your setup lets you cut at efficient feeds without babysitting every move.
8. Standardize DXF Naming and Storage for Fast Reuse
Efficiency is not only about individual cuts—it is also about how quickly you can rerun profitable jobs.
- Include project code, material, thickness, and revision in the DXF filename.
- Store DXF files in folders by process (laser, plasma, router) and material (steel_3mm, birch_6mm, etc.).
- Keep a separate library of “production-ready” DXFs that have already been tested on the machine.
When a repeat order comes in, you should be able to grab the exact DXF you used last time and go straight to nesting.
9. Build a “Proven Settings” Library Linked to DXF Files
After you dial in a DXF and CAM strategy that cuts fast and clean, capture that knowledge so you do not start from zero again.
- Save CAM files and notes alongside the DXF: feeds, speeds, power, pierce heights, and gas or air settings.
- Mark which designs are safe for high-speed runs and which ones require conservative settings.
- Use that data when quoting: efficient DXF + proven settings = more accurate time estimates.
Over time, your best DXF designs become a library of fast, reliable recipes you can plug into your schedule whenever machines have capacity.
10. Run Small Tests to Validate Efficient Strategies
Pushing for efficiency is always a balance between speed and quality. Test cuts help you find that sweet spot.
- Use offcuts or small sections of a nest to try higher feed rates and lower cycle times.
- Watch for signs of overheating, edge quality loss, or dimensional drift.
- When a new combination of DXF cleanup + CAM strategy works well, lock it in as your new standard for similar parts.
This method lets you gradually increase efficiency without gambling full sheets of material on untested settings.
Conclusion
To maximize CNC cutting efficiency using DXF files, treat your drawings as more than just artwork—they are the engine behind your entire workflow. Clean geometry, smart use of layers, nesting-friendly shapes, reduced pierces, and consistent naming all add up to shorter programming time and faster cutting on the shop floor. When you optimize DXF files with the machine in mind, every job becomes easier to run, easier to repeat, and more profitable.


