CNC cutting for beginners does not have to be scary. With a few basic skills and clean DXF files, you can go from simple ideas on your laptop to real parts made from metal, wood, or acrylic.
What Is CNC Cutting?
CNC (Computer Numerical Control) cutting means using a computer-controlled machine to cut shapes out of flat material. Instead of cutting by hand, you load a design into software, set your cutting settings, and let the machine follow the path automatically.
Common CNC cutting machines include:
- Laser cutters: Great for thin wood, MDF, acrylic, leather, and engraving.
- Plasma cutters: Best for steel, stainless steel, and aluminum plates.
- CNC routers: Ideal for wood, plastics, foams, and some metals.
- Water-jet cutters: Used for stone, glass, composites, and thick metals.
What Are DXF Files?
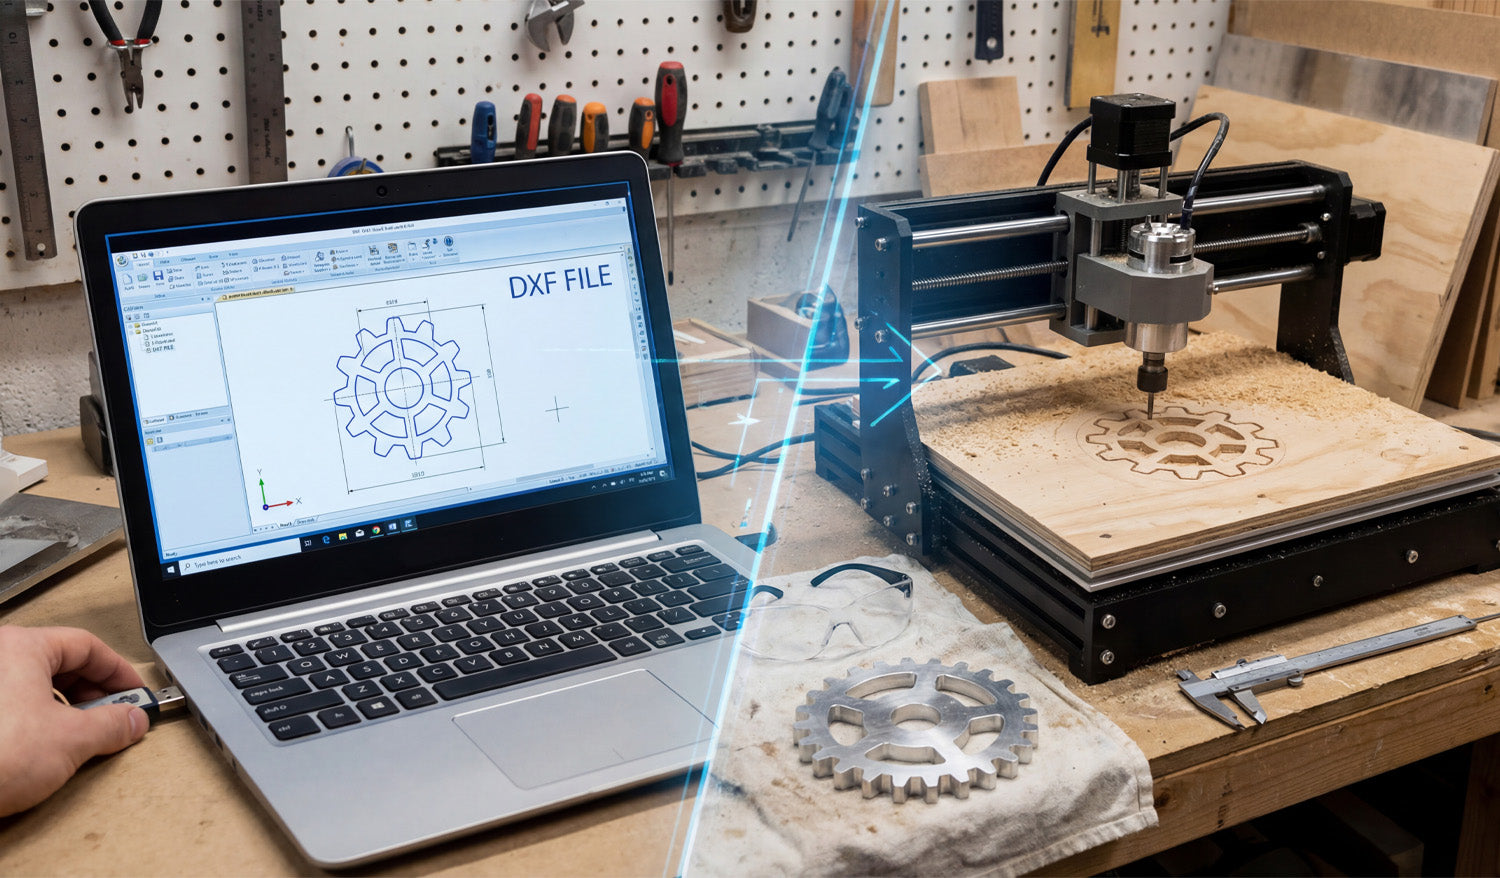
DXF stands for Drawing Exchange Format. It is a 2D vector file type that stores lines, arcs, and curves as precise geometry instead of pixels. In simple terms, a DXF file is a digital blueprint that tells your CNC machine where to move and what to cut.
DXF files are popular because:
- Most CAD and CAM software can open them.
- They are perfect for 2D cutting and engraving work.
- You can scale, edit, and reuse them without losing quality.
How DXF Files Fit into the CNC Workflow
For beginners, it helps to see the big picture from idea to finished part. The basic CNC cutting workflow looks like this:
- Design or download: You create a drawing or download a DXF file.
- Import into CAM software: You open the DXF and set up toolpaths (how the machine will cut).
- Set cutting parameters: You choose speed, power, pierce settings, or feeds and speeds.
- Simulate: You preview the cut on screen to make sure everything looks correct.
- Cut on the machine: You send the job to your CNC machine and cut the part from your chosen material.
The DXF file is the bridge between your design idea and the real CNC machine.
Where Beginners Can Get DXF Files
You do not have to draw everything from scratch when you are just starting out. There are a few easy ways to get DXF files:
- Free DXF libraries: Many websites offer free DXF files so you can test your machine and learn the workflow.
- Paid design bundles: Larger DXF collections that are ready for commercial use and give you hundreds or thousands of designs.
- Simple own designs: You can draw basic shapes like brackets, signs, or panels in basic CAD software and export them as DXF.
Starting with clean, cut-ready DXF files lets you focus on learning the machine instead of fighting with drawings.
Step-by-Step: Your First CNC Cutting Project with DXF Files
Step 1: Choose a Simple Design
- Pick a small project like a basic sign, a simple wall art shape, or a bracket.
- Avoid extremely fine detail and tiny text for your first cuts.
- Make sure the design fits easily inside your machine’s working area.
Step 2: Open the DXF File in Your Software
- Open your CAD or CAM software and use the Import or Open command.
- Load the DXF file and check that it appears at a reasonable size on the screen.
- Switch to an outline or wireframe view so you see only the paths your machine will follow.
Step 3: Check the Scale and Units
- Use a measure tool to check the overall width and height of the design.
- Confirm the file is in the correct units (millimeters or inches).
- If the part is too large or too small, use the scale command to adjust it before you continue.
Step 4: Look for Basic Geometry Problems
Even beginners can spot and fix the most common DXF issues:
- Open paths: Make sure outlines are closed loops, not almost-closed shapes with small gaps.
- Duplicate lines: Delete any lines that sit exactly on top of each other to avoid double cuts.
- Stray points: Remove tiny dots or segments that serve no purpose.
Step 5: Assign Toolpaths in CAM Software
- Tell the software which paths are outside cuts, inside cuts, and engraving (if any).
- Set cutting direction and order. A good rule is to cut inner shapes and holes first, then the outer perimeter last.
- Apply kerf compensation so the machine cuts slightly off the line to achieve true final dimensions.
Step 6: Choose Cutting Settings for Your Material
Your machine manual or community forum is a good place to start for basic settings. For beginners:
- Use conservative speeds and power levels until you understand how your machine behaves.
- Write down settings that work well, including material type, thickness, speed, power, and gas or air if applicable.
- Remember that each machine and material combination may require different settings.
Step 7: Run a Simulation
- Most CAM software can simulate the cut on screen.
- Watch for unexpected jumps, strange toolpaths, or missed shapes.
- If something looks wrong, go back and fix the DXF or toolpaths before going to the machine.
Step 8: Cut a Test Piece on Scrap Material
- Always test your first design on scrap material, not expensive or final stock.
- Stay near the machine and watch how it cuts. Look at the arc or beam, listen for unusual sounds.
- After the cut, check fit, edge quality, and detail. Adjust settings and toolpaths as needed.
Safety Basics for CNC Cutting Beginners
CNC cutting uses high power tools, hot sparks, and moving parts. Even small machines deserve respect.
- Wear appropriate eye and hearing protection.
- Use gloves and proper clothing when handling sharp material, but follow your machine’s safety rules about clothing near moving parts.
- Keep your work area clean and free of loose items.
- Know how to stop the machine quickly in an emergency.
- Never leave the machine unattended while it is cutting, especially during your early learning phase.
Common Mistakes Beginners Make with DXF Files
Knowing the typical beginner mistakes makes them easier to avoid:
- Using random images as DXF: Regular JPG or PNG images must be converted to vector paths before cutting.
- Forgetting to check size: Cutting a design only to discover it is much smaller or larger than expected.
- Too much detail: Very thin lines and tiny gaps that look good on screen but fail in real materials.
- No test cuts: Going straight to final material without testing settings first.
- Poor file organization: Saving everything as “new.dxf” and losing track of which design actually worked.
Tips for Growing Your CNC Skills with DXF Files
- Start with simple, proven DXF designs and focus on mastering your machine settings.
- Keep a notebook or digital log of what settings worked for each material and thickness.
- Gradually move to more detailed projects once you feel comfortable with basic shapes.
- Try editing existing DXF files to learn how geometry, layers, and scaling affect the final cut.
- Build your own organized DXF library so you can quickly repeat successful jobs or offer them as products.
Conclusion
CNC cutting for beginners is much easier when you understand the role of DXF files and follow a simple, repeatable workflow. By starting with clean designs, checking scale and geometry, assigning toolpaths carefully, and always testing on scrap material, you can quickly gain confidence with your CNC laser, plasma, or router. Over time, your DXF library and your skills will grow together, turning basic digital drawings into real, accurate parts and creative products.


