Organizing your DXF files properly is one of the easiest ways to speed up CNC cutting, avoid mistakes, and keep your shop running efficiently as your design library grows.
Why DXF File Organization Matters for CNC Cutting
In a real CNC workflow, the problem is rarely “I do not have a design.” It is usually “I cannot find the right design, the latest version, or the file that was already tested.” Poor organization costs time, creates wrong cuts, and makes training new operators harder.
A clear DXF organization system helps you:
- Find proven designs quickly when an order comes in.
- Know which files are ready for production and which are still prototypes.
- Keep master artwork safe while using copies on the shop floor.
- Share files across laser, plasma, router, or water-jet machines without confusion.
Step 1: Build a Logical Folder Structure
Start by creating a folder structure that matches the way you actually work. Keep it simple and scalable.
Common ways to organize DXF files:
- By product category: Animals, signs, panels, brackets, logos, letters, etc.
- By material or thickness: Steel-3mm, Steel-6mm, Stainless-2mm, MDF-18mm.
- By machine type: Laser, Plasma, Router, Waterjet.
- By client or project: ClientName / ProjectName / DXF.
You can combine ideas, for example:
- CNC_Library / Laser / Wall_Art / Animals
- CNC_Library / Plasma / Brackets / Steel_6mm
As long as the structure is consistent and easy to understand, it will help everyone in the shop find what they need.
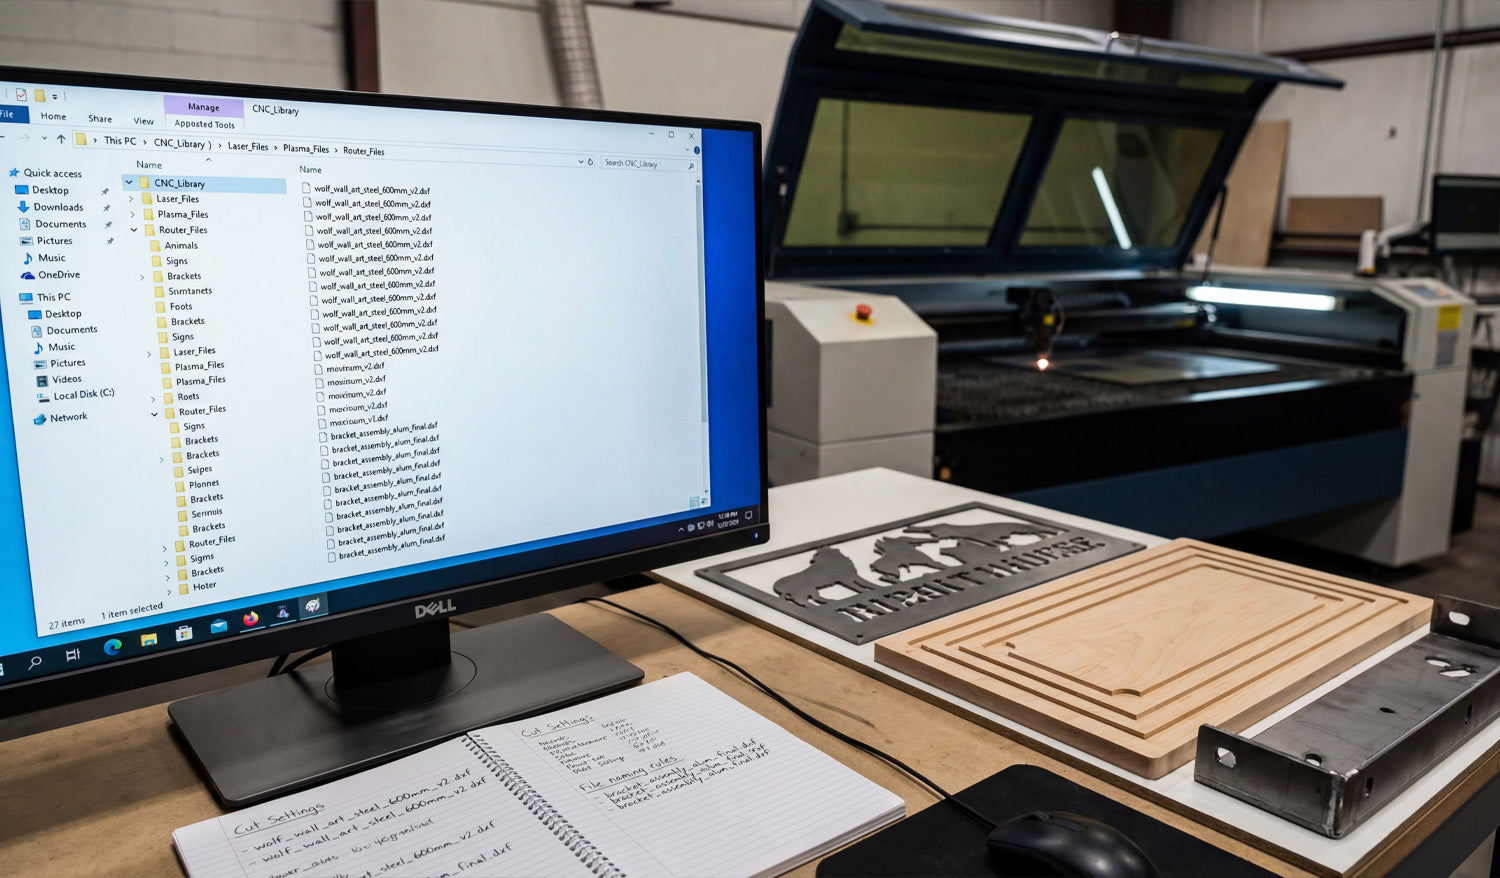
Step 2: Use Clear, Consistent File Names
Good file names are just as important as good folders. They should tell you what the design is without opening it.
Useful elements to include in a DXF file name:
- Product type or category: wolf_wall_art, round_sign, L_bracket.
- Material or thickness (optional): steel_3mm, MDF_18mm.
- Size or main dimension: 600mm, 24inch.
- Version: v1, v2, final.
Example naming patterns:
- wolf_wall_art_steel_3mm_600mm_v2.dxf
- house_number_sign_MDF_18mm_400mm_final.dxf
Staying consistent makes it much easier to sort, search, and recognize designs at a glance.
Step 3: Separate Master Designs from Production Files
Your original “master” design should not live in the same place as everyday production files. Keeping them together is a common source of accidental edits and lost work.
- Create a Master folder for original, fully editable designs (CAD, AI, SVG, etc.).
- Create a Production folder for cut-ready DXF files and machine-specific versions.
- Never overwrite master files with quick edits from the shop floor.
This separation protects your design assets and keeps production workflows clean and focused.
Step 4: Store Related Files Together
A DXF file is only one piece of a full CNC job. You may also have:
- Preview images (JPG/PNG) for quick visual reference.
- CAM files or post-processed G-code for specific machines.
- Notes about tested settings (power, speed, pierce, feeds, speeds).
- License or usage information if the design came from an external library.
To stay organized, group related files inside a single folder per design or per product:
- wolf_wall_art / master_design.ai
- wolf_wall_art / wolf_wall_art_steel_3mm_600mm.dxf
- wolf_wall_art / wolf_wall_art_preview_600mm.png
- wolf_wall_art / notes_cut_settings.txt
Step 5: Use Version Control for Changes
Designs evolve. Holes move, sizes change, customers request adjustments. Without version control, it is easy to lose track of which DXF is the correct one.
- Add v1, v2, v3 or date stamps to file names when making changes.
- Keep a short CHANGELOG.txt or note file in each design folder summarizing what changed and why.
- Mark stable designs as _final once they are fully tested and approved.
Even a simple manual version system is better than guessing which file “should” be right before a rush job.
Step 6: Create “Ready-to-Cut” Folders for the Shop Floor
Operators on the shop floor should not have to dig through old drafts or half-finished experiments. Make their life easier with a clear “ready-to-cut” structure.
- Create a top-level folder like Ready_To_Cut or Production_Files.
- Inside, create folders by machine: Laser, Plasma, Router.
- Only place tested, approved DXF files in those folders.
This way, when an operator opens the Laser / Ready_To_Cut folder, every design they see has already passed your quality check.
Step 7: Use an Index or Catalog for Your DXF Library
As your library grows, even a good folder structure may not be enough. Creating a central index helps you see the “big picture.”
You can use a simple spreadsheet or database that tracks:
- Design name and category.
- File path or folder location.
- Available sizes and materials.
- Machine compatibility (laser, plasma, router).
- Notes on tested settings and best-selling variations.
This catalog becomes a powerful tool when you want to plan new product lines, quote jobs, or decide which designs to promote.
Step 8: Tag Files with Metadata Where Possible
On many operating systems, you can add tags or comments to files. While not as important as folders and names, metadata is helpful for quick search.
- Add tags like “animal, wall art, 600mm, steel” to your DXF or preview files.
- Use consistent keywords for materials, sizes, and styles.
- Search by tag when you need a certain type of design for a new product idea.
If your system does not support tags well, stick to consistent naming and a separate spreadsheet index.
Step 9: Back Up and Sync Your DXF Library
DXF files and design assets are a core part of your business. Losing them can be more painful than losing a single machine.
- Regularly back up your entire CNC_Library folder to an external drive or cloud storage.
- Use at least one off-site backup to protect against hardware failure or local disasters.
- Test your backup occasionally by restoring a few sample designs and opening them.
A strong backup strategy ensures your organized library remains safe for years to come.
Step 10: Document Your System and Train Your Team
The best organization system only works if everyone follows it. Take a few minutes to document your structure and rules.
- Write a short guide: how to name files, where to save new designs, how to mark files as “final.”
- Show new staff where to find Master versus Ready-To-Cut files.
- Review the system occasionally and adjust it if your shop’s needs change.
Consistency over time is what turns a folder tree into a true CNC design library.
Common DXF Organization Mistakes to Avoid
- Storing everything on the desktop: Hard to back up and impossible to scale.
- Using names like “new.dxf” or “test.dxf”: No one knows what they are later.
- Mixing master and production files: Increases the risk of overwriting critical designs.
- No backup plan: A single hard-drive failure can wipe out years of work.
- Changing rules every month: Pick a structure and stick with it unless you have a clear reason to change.
Conclusion
Organizing your DXF files for efficient CNC cutting is not about fancy software—it is about simple, consistent habits. With a logical folder structure, clear file names, separate master and production files, a central index, and solid backups, you turn scattered designs into a reliable CNC library. That means faster setup, fewer errors, easier training, and a smoother path from digital artwork to finished parts on every machine in your shop.


