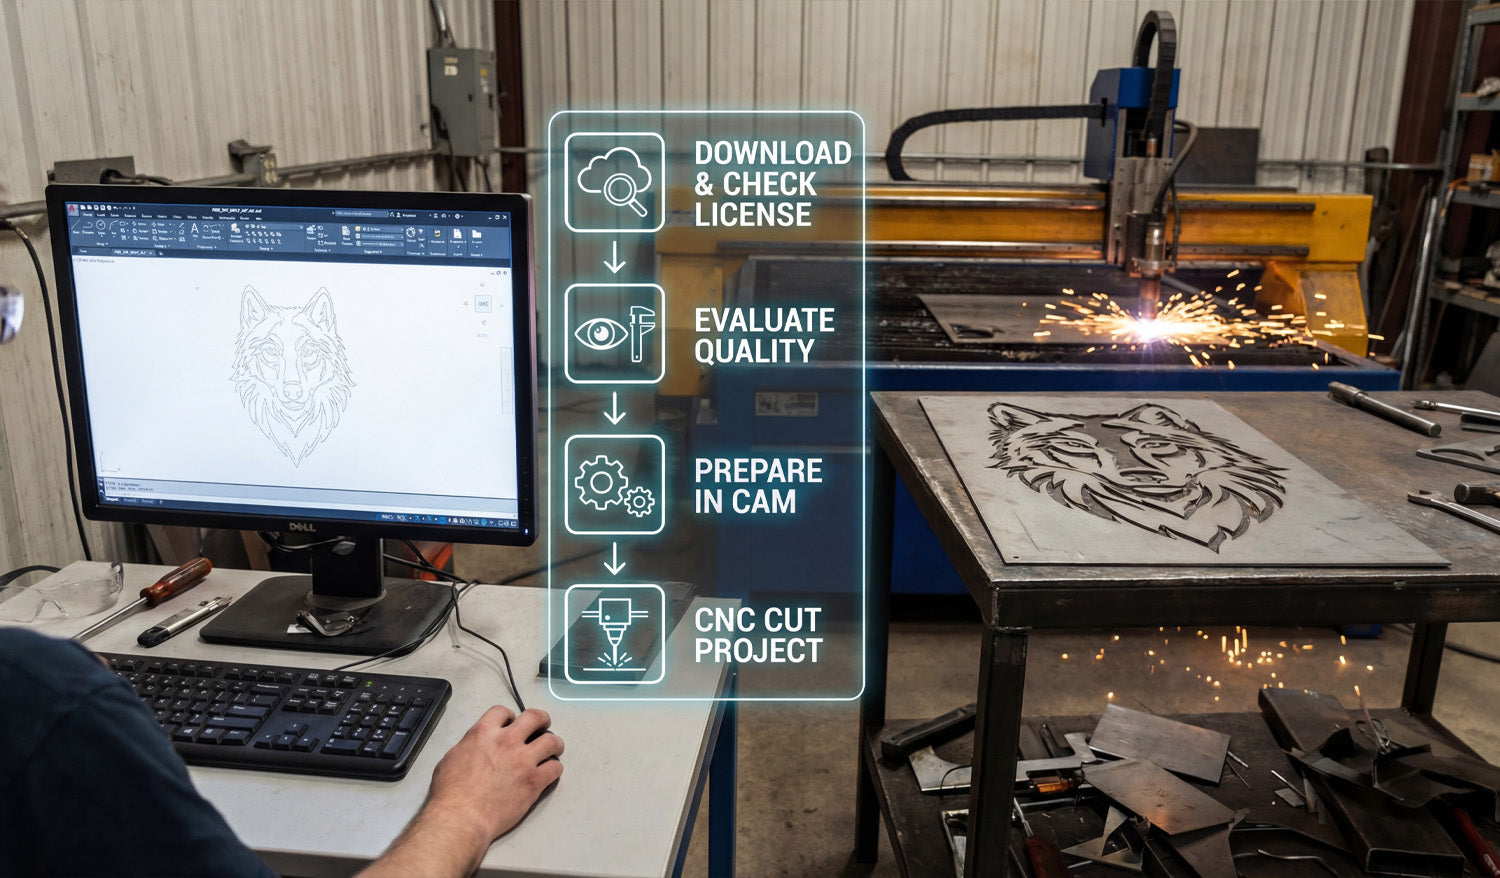
Bridging the gap between a digital design on a computer screen and a hot, finished metal part on a plasma table is the most critical skill for any fabricator. As illustrated in the workflow overlay of our latest workshop photo, the journey involves more than just pressing "print." It requires a disciplined four-step process: sourcing the right file, verifying its quality, preparing the toolpaths in CAM, and finally, executing the cut. Mastering this specific workflow is what turns a garage hobbyist into a profitable commercial shop, ensuring that the wolf design you see on the screen matches the precision cut on the table.
Step 1: Download & Check License
The process begins long before the sparks fly. It starts with sourcing high-quality vector files. Whether you are downloading from our Free DXF Collection or purchasing premium bundles, the very first step is understanding your usage rights. As seen in the first icon of the workflow, you must "Check License." Are you cutting this wolf for a personal project, or are you planning to sell 50 units at a local craft fair? Always review the Legal Usage License Agreement to ensure your commercial production is fully authorized.
Step 2 & 3: Evaluate Quality and Prepare in CAM
Once the file is downloaded, don't rush to the machine. As the second and third icons suggest, you must Evaluate Quality and Prepare in CAM. Open the file in your CAD software (like AutoCAD or Fusion 360, shown on the monitor). Check for open loops, double lines, or excessive nodes that can cause your machine to stutter.
Next, move to your CAM software to generate the G-Code. This is where you define your lead-ins and lead-outs—essential for plasma cutting to avoid burn marks on the finished edge of detailed designs like the wolf's fur. If you are new to this and unsure about file compatibility, our FAQ page handles common questions regarding file types and software setup.
Step 4: The Cut & The Profit
Finally, we reach the stage shown on the right side of the image: CNC Cut Project. This is where the preparation pays off. A clean DXF file results in a smooth cut with minimal dross, reducing the time you spend grinding and finishing the metal later.
Designs like this geometric wolf are high-value items in the home decor market. By accessing our Full Access Bundle, you ensure a steady stream of "cut-ready" designs. This allows you to focus on production and sales rather than spending hours fixing broken vectors.
Ready to Spark Your Production?
Consistency is key. By following this standardized workflow—Download, Check, Prepare, Cut—you minimize wasted material and maximize production speed. If you have any specific questions about getting started or need support with a file, feel free to contact us directly. It’s time to turn that digital potential into steel reality.


