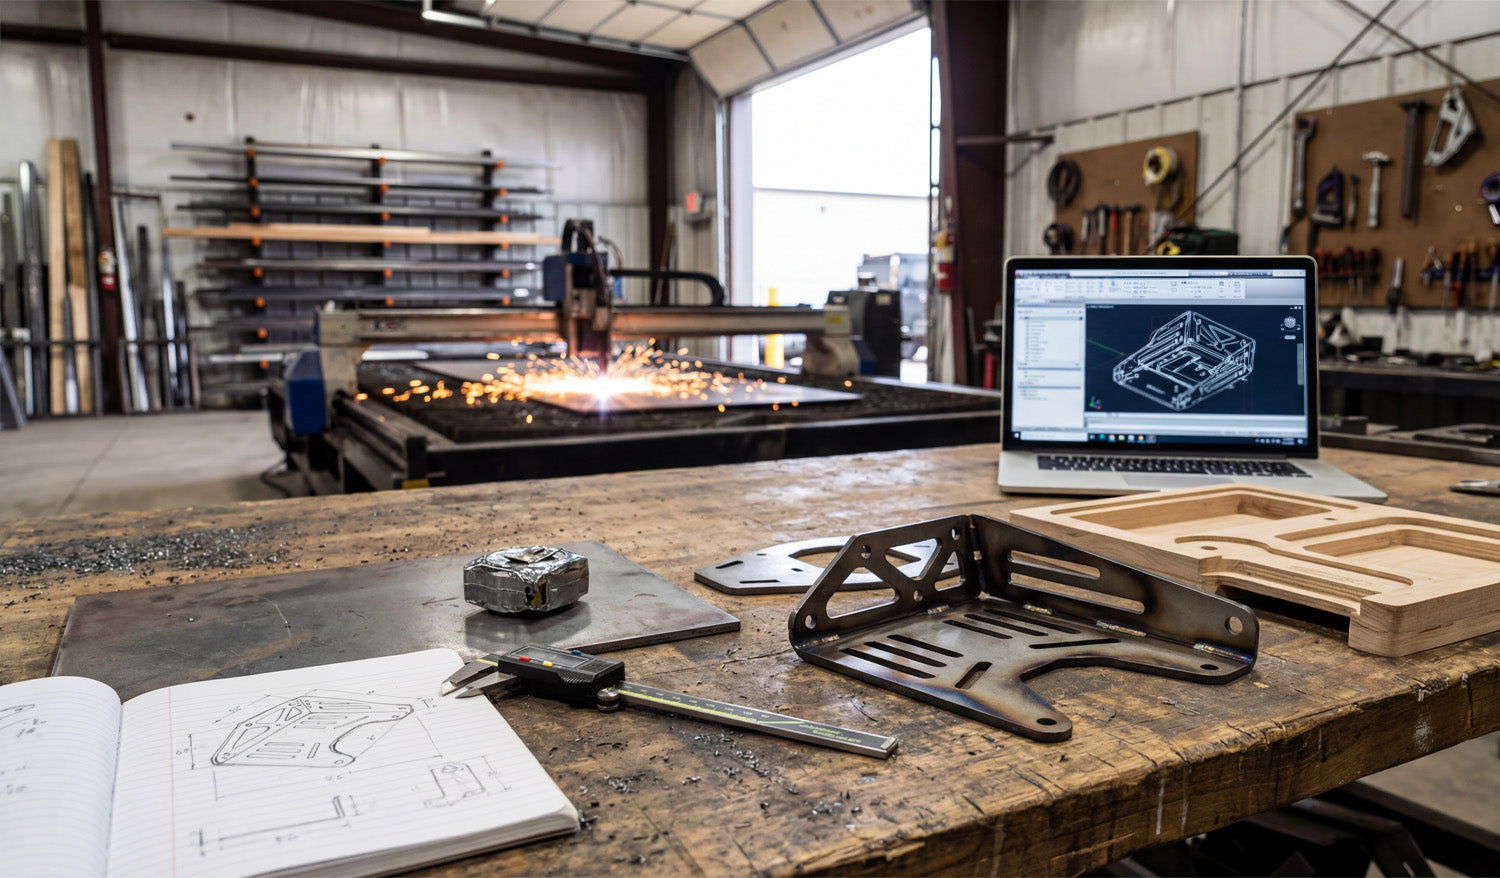
Every successful CNC project begins long before the machine torch fires up; it starts with a concept, often scribbled in a notebook, and evolves through digital verification before becoming a physical reality. The image above perfectly captures the full lifecycle of a custom fabrication project: from the initial hand-drawn dimensions on paper to the 3D CAD model on the laptop, and finally to the sparks flying in the background as the plasma cutter does its work. Understanding this workflow—specifically the transition from a rough sketch to a precision DXF file—is what separates hobbyists from professional fabricators who turn metal into profit.
1. The Power of the Sketch (and the Caliper)
Look at the foreground of the workbench. You see a notebook with a hand-drawn diagram and a set of digital calipers. This is the most critical stage. Before you even touch your computer, you need to define your constraints. Whether you are reverse-engineering a broken part or designing a custom bracket for an automotive application, precise measurement is non-negotiable. A variance of just 1mm in your initial sketch can result in a part that doesn’t bolt up, wasting expensive sheet metal.
2. Digital Verification: Why We Prototype
One of the most interesting elements in this photo is the wooden prototype sitting next to the finished metal bracket. This is a "CNC Pro Tip" that can save you thousands of dollars.
Before cutting expensive steel or aluminum, successful shops often run a test cut using cheap materials like MDF, plywood, or cardboard. This allows you to:
- Check for physical interference and fitment.
- Verify that your bend lines are calculated correctly (bend deduction).
- Ensure the DXF file scale is 1:1.
Once the wooden prototype fits, you can confidently send the DXF file to the laser or plasma cutter, knowing the final result will be perfect.
3. From Screen to Steel: The Finished Product
The laptop screen shows a 3D model of the bracket, while the finished steel part sits on the table, folded and welded. This complex bracket features slots for adjustability and lightening holes to reduce weight—features that are easy to design in CAD but difficult to make by hand. This is the beauty of CNC technology; it allows for high-complexity parts to be produced repeatedly with zero variance.
For those looking to enter the market of selling custom parts, complex brackets like these are high-demand items in the off-road, construction, and interior design markets. You don't always need to reinvent the wheel, though. Having a library of pre-tested designs allows you to skip the drafting phase and go straight to cutting.
4. Streamline Your Workflow
If you want to focus more on the "cutting" and less on the "drawing," utilizing high-quality, pre-designed vector files is the key. You can start practicing your workflow today by downloading some of our tested designs from the Free DXF Files section.
For serious fabricators ready to equip their shop with a massive catalog of cut-ready designs—from privacy screens to fire pits and brackets—our Full Access Bundle offers an all-in-one solution to keep your machine running and your revenue flowing.


