Turning a simple idea scribbled on graph paper into a precise steel component is the ultimate satisfaction in the world of metal fabrication. Whether you are holding a functional prototype bracket or creating intricate decorative metal art, the process relies on a proven workflow: Concept, CAD/DXF Design, CAM Toolpath, and finally, the CNC Cut. Mastering this bridge between the digital and physical worlds is what separates hobbyists from professional fabricators, allowing users to transform raw steel sheets into valuable, sellable products.
1. The Roadmap: Understanding the CNC Workflow
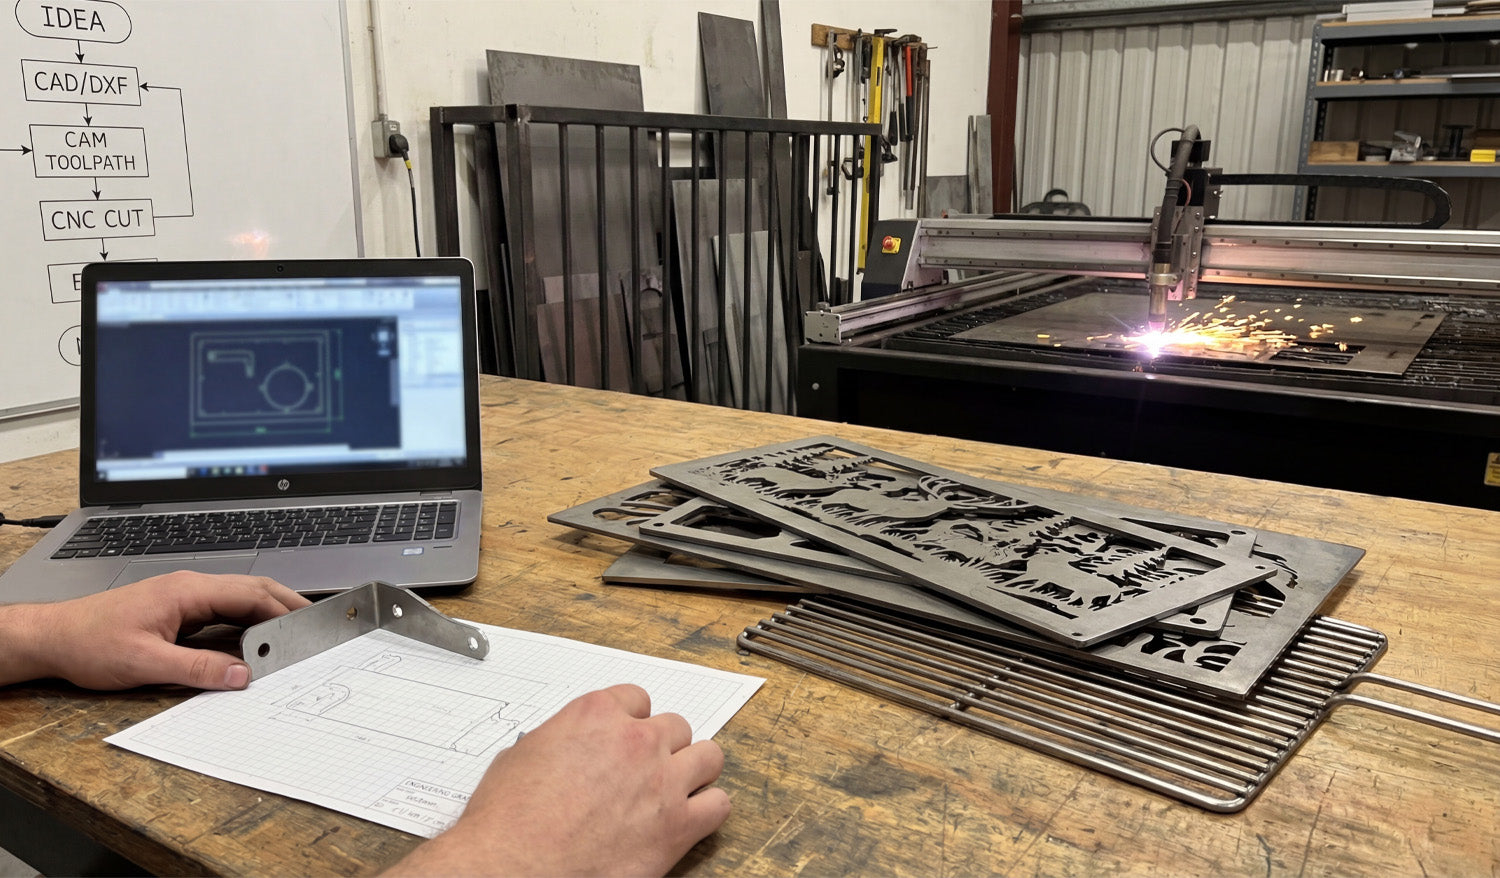
As seen on the whiteboard in our workshop, the path to a successful cut follows a strict logic. It begins with an IDEA. This is often just a rough sketch on paper where you calculate dimensions and bend lines. The next step is the most critical: CAD/DXF.
To communicate with your machine—whether it's a plasma cutter, laser, or waterjet—you must convert that sketch into a vector file. The DXF (Drawing Exchange Format) is the industry standard here. It serves as the universal language that translates your vision into mathematical coordinates that the computer understands.
2. CAD to CAM: The Invisible Bridge
Once you have your clean DXF file, the process moves to CAM (Computer-Aided Manufacturing). This is where you define your "Toolpath." You tell the software how fast to move, where the lead-ins and lead-outs should be, and confirm the kerf width.
In the photo, you can see the laptop running simulation software. This step is vital to prevent wasting expensive metal. A well-optimized DXF file ensures that your CAM software doesn't choke on open vectors or intersecting lines, making the transition to the CNC CUT seamless.
3. Prototyping vs. Production
There is a distinct difference between fabricating a one-off part and mass production. In the foreground of the image, holding a bent metal bracket against the original graph paper sketch represents prototyping. This ensures the fitment is correct before running a batch of 100.
Conversely, the decorative deer panels and grill grates on the workbench represent production products. These are high-value items that are ready for the consumer market. Using high-quality, pre-tested designs eliminates the trial-and-error phase, allowing you to go straight to cutting and selling.
4. Monetizing Your Machine
For shop owners, time is money. Drawing every single file from scratch reduces your machine's billable runtime. Utilizing a library of ready-to-cut designs allows you to say "yes" to more customers and fill your shop with diverse inventory, from fire pits to wall art.
If you are just getting started and want to test your machine's capabilities, check out our collection of Free DXF Files. For those ready to scale their business with thousands of proven designs, our Full Access Bundle provides a lifetime of creative resources.
Conclusion
From the spark of the plasma torch to the final bend of the metal, the CNC process is an art form rooted in technical precision. By mastering the workflow from "Idea to Cut," you unlock the full potential of your machinery.


