Creating perfectly optimized DXF files for CNC plasma cutting is less about “pretty artwork” and more about smart geometry, correct kerf planning, and designs that match how plasma really behaves on steel, stainless, or aluminum.
Why Plasma Needs Special DXF Optimization
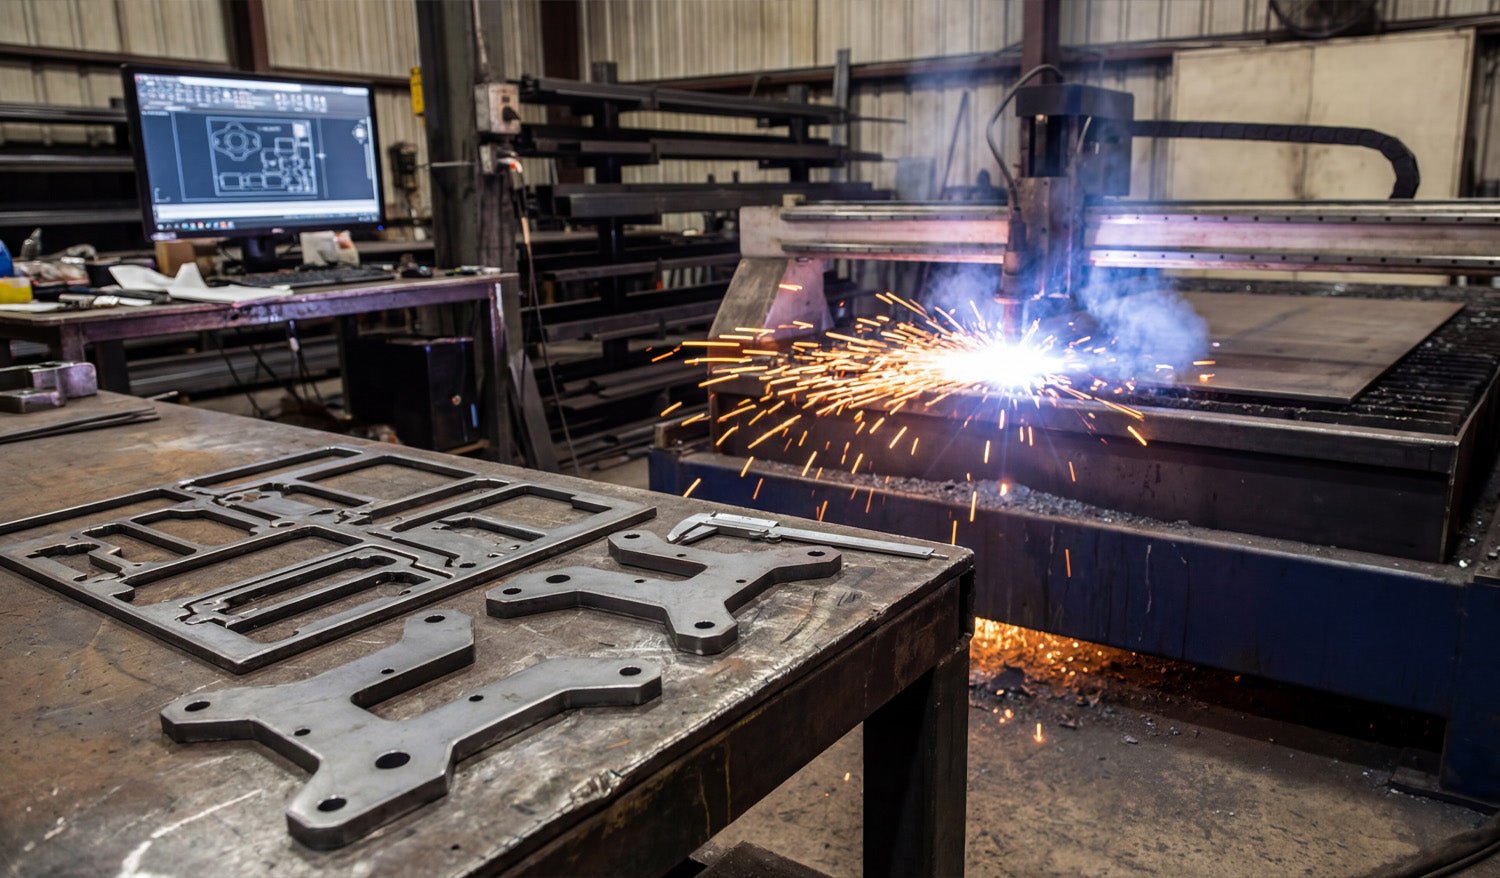
Plasma cutting is powerful but not delicate like a fine laser. It has a wider kerf, more heat, and slightly rougher edges. If your DXF file is built like it is going to a laser or a router, you will fight:
- Blown-out small details and thin bridges.
- Out-of-round holes and distorted slots.
- Warped parts from long, unplanned cuts.
- Parts falling into the table mid-cut because the skeleton is weak.
Optimizing DXF files for plasma means designing shapes, holes, and text that cut cleanly at plasma scale and thickness—not just on your monitor.
Step 1: Lock In Units, Material, and Thickness Before You Draw
Great plasma DXF work starts before the first line is drawn.
- Pick your units: Decide on millimeters or inches and set your CAD/vector software accordingly.
- Choose material and thickness: 3 mm mild steel, 10 mm plate, 1/4" aluminum, etc. This will drive your minimum feature sizes.
- Note your machine’s kerf range: Different nozzles and amps produce different kerf widths.
Write these three things down (units, material, thickness) in project notes. Every design decision you make in the DXF should respect them.
Step 2: Design Plasma-Friendly Geometry
Plasma loves bold, sturdy shapes and hates fragile, tiny details. Use that rule to guide your DXF design.
- Minimum web/bridge width: Keep thin connections and webs clearly larger than the kerf and strong enough to survive slag and cleanup.
- Simplify fine detail: Remove tiny spikes, hairline gaps, and micro cutouts that will just burn away or fuse.
- Round sharp internal corners: Add small radii; plasma naturally rounds corners, so design with that in mind.
- Use bold shapes for small parts: The smaller the part, the more robust it should be in the DXF.
If a detail would be hard to cut by hand with a plasma torch, it is probably too small for CNC plasma at production speeds.
Step 3: Plan for Good Hole and Slot Quality
Holes and slots are where plasma shows its personality. If your DXF does not respect plasma rules, holes end up tapered, egg-shaped, or undersized.
- Respect minimum hole size: Avoid tiny holes that are close to your kerf width. As a simple rule of thumb, make hole diameters significantly larger than the kerf and at least a bit larger than material thickness.
- Use true circles in the DXF: Draw holes as real circles or arcs, not as rough polygons or traced shapes.
- Keep holes away from edges: Do not push holes too close to outside profiles where heat can distort them.
- Oversize holes slightly if needed: If real cuts come out tight, you can build that correction into the DXF for repeat jobs.
The more consistent your DXF hole geometry is, the easier it is to dial in repeatable plasma settings for clean, round holes.
Step 4: Clean the DXF Geometry Until It Is “Boring”
A perfectly optimized plasma DXF looks boring to a CAD nerd—and that is good. Plasma loves clean, simple geometry.
- Delete duplicates: Remove overlapping lines and arcs that would cause double cuts and ugly edges.
- Close all contours: Make sure every outer profile and inner cutout is a fully closed loop.
- Remove junk: Delete construction lines, tiny islands, specks, and artifacts from tracing.
- Join polylines: Convert many small segments into continuous polylines wherever possible.
- Simplify curves: Use “simplify path” tools to reduce node count without changing the visible shape.
The goal is geometry your CAM software can read in one pass, without guessing or patching gaps for you.
Step 5: Use Layers to Separate Cut Types
Even if your plasma jobs are “just cutting,” layers make your DXF safer and faster to program.
- Create layers such as CUT_OUTSIDE, CUT_INSIDE, MARKING, and REFERENCE.
- Put outer profiles (final part outlines) on CUT_OUTSIDE.
- Place holes, slots, and inner cutouts on CUT_INSIDE.
- Use MARKING for layout marks, bend lines, or weld location marks.
- Keep centerlines, dimensions, and notes on REFERENCE so they are never cut.
With this structure, you can quickly map each layer to different plasma settings or decide to ignore layers like REFERENCE in CAM.
Step 6: Think Ahead About Pierce Points and Lead-Ins
Plasma cuts do not start magically. Each path begins with a pierce that creates a rougher spot. If your DXF does not leave room for that pierce, you lose precision or aesthetics.
- Avoid pierces on critical edges: Give CAM room to place pierces away from tight corners or visible design areas.
- Leave “landing zones”: In your shapes, consider where lead-ins can safely start and end without leaving marks in important areas.
- Use loops or small tabs if needed: Slight design tweaks can give your software a safe place to enter and exit the cut.
You do not draw lead-ins inside the DXF, but you design the shapes so that good lead-ins are possible and obvious.
Step 7: Design for Skeleton Strength and Part Stability
On plasma tables, the “skeleton” (what is left of the sheet) matters. A perfect DXF does not cause the skeleton to collapse or eject parts prematurely.
- Avoid ultra-thin slivers: Long, narrow strips between parts twist and catch on the torch head.
- Stagger cuts: When nesting, avoid placing many long, parallel cuts side by side in the same area.
- Plan tabs for small parts: For tiny parts, add tabs in CAM and design shapes that can accept them without ruining the look.
- Keep key support areas intact: Do not cut away everything in one region; leave material to support later cuts.
Designing with skeleton behavior in mind is one of the biggest differences between “art DXF” and “production plasma DXF.”
Step 8: Match Detail Level to Material Thickness
The same DXF should not be used blindly for 3 mm sheet and 20 mm plate. Thickness changes everything.
- Thin material (sheet): You can keep more detail, but watch out for heat distortion and flimsy bridges.
- Thick plate: Simplify internal detail, beef up text and ornaments, and avoid tiny cutouts that will trap dross.
- Per-thickness variants: Consider saving separate DXF versions tuned for specific thickness ranges.
A design that looks perfect in 3 mm can be a nightmare in 12 mm. Your DXF library is stronger when you create versions optimized for the real plate you cut.
Step 9: Export a Plasma-Friendly DXF Version
Many CAM and controller packages are happiest with older, simpler DXF flavors.
- Export as a widely supported version such as R12 or R14 DXF when possible.
- Strip out unneeded items: hatches, dimensions, 3D entities, and embedded images.
- Verify that layers, colors, and line types came across correctly in a DXF viewer.
The lighter and cleaner your exported DXF is, the fewer headaches you will have at the plasma table.
Step 10: Test Cut, Measure, and Lock In the “Production” File
No DXF is truly “perfectly optimized” until it has been cut and checked at least once on the real machine.
- Run a test cut on scrap or offcut material using your export DXF.
- Measure holes, slots, tab fits, and overall sizes with calipers.
- Note which features are too fragile, too tight, or not worth the cut time.
- Tweak the DXF as needed (hole diameters, bridge widths, simplified detail) and save a new version marked as production ready.
From that point on, your plasma DXF is not just “nice artwork”—it is a proven, optimized pattern you can run again and again with confidence.
Quick Plasma DXF Checklist
Before you send a DXF to your CNC plasma cutter, ask:
- ✔ Units, material, and thickness are clearly defined.
- ✔ All profiles are closed, and there are no duplicate or stray entities.
- ✔ Detail level matches plasma kerf and material thickness.
- ✔ Holes and slots are drawn as true circles/slots and sized for real-world cutting.
- ✔ Layers cleanly separate outside cuts, inside cuts, marking, and reference geometry.
- ✔ Geometry allows safe pierce locations and lead-ins away from critical edges.
- ✔ The nested layout preserves skeleton strength and small-part stability.
- ✔ At least one test cut has been made, measured, and used to refine the final DXF.
Conclusion
Creating perfectly optimized DXF files for CNC plasma cutting is about designing for the reality of plasma—not for the perfection of the CAD screen. When you control geometry, hole quality, detail level, skeleton behavior, and DXF export, your plasma table stops being a guessing game and becomes a predictable, efficient production tool that turns bold vector designs into strong, clean metal parts.


